【ミシン不要】“手縫いのみ”で裾上げする方法|流しまつり
![手縫いで縫うズボンの裾上げ方法](https://handmade-iroiro.com/wp-content/uploads/2024/12/hand-stitched-pants-hem.jpg)
![](https://handmade-iroiro.com/wp-content/uploads/2023/04/hukidashi_icon_woman-150x150.jpg)
ミシンなし、手縫いのみで裾上げする方法を知りたい!
手縫いのみで裾上げするなら、“流しまつり”がおすすめです。
今回は、“ミシン不要・手縫いのみ”で裾上げする方法を解説します。
参考にしていただければ、幸いです。
“手縫いのみ”で裾上げする方法
ミシンを全く使わず“手縫いのみ”で裾上げしたいなら、流しまつりで縫う方法があります。
流しまつりは、やわらかい布地や裏布、動きを持たせて止めたい時などに使えます。
表布と折山をほんの少しだけすくって縫うので、表に縫い目がほとんど出ません。
ズボンやスカートの裾上げで、表に縫い目をできるだけ出したくないという場合は、流しまつりがおすすめです。
今回は、流しまつりでズボンの裾上げをする方法を解説します。
スカートの場合も、同じ要領で裾上げしてみて下さい。
用意するもの
用意するものは以下です。
- 糸
- ミシン
- アイロン
- まち針
- しつけ糸
- 印つけ(チャコペンなど)
- 裁ち鋏
- 糸切り鋏
印付けはチャコナーが便利です。おすすめの印つけは以下の記事で紹介しています▼
![](https://handmade-iroiro.com/wp-content/uploads/2022/10/dressmaking-marking-tool-300x169.jpg)
流しまつりで裾上げをする方法
流しまつりで裾上げする方法は、以下です。
![三つ折りにする](https://handmade-iroiro.com/wp-content/uploads/2024/12/pants-hem-hand-stitched-method_01.jpg)
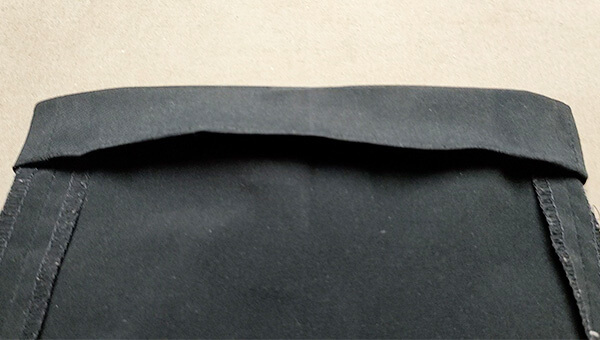
布地を出来上がり線で折り、縫い代を三つ折りに折ります
三つ折りにするか完全三つ折りにするかは、お好みでOKです。
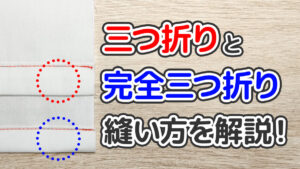
三つ折りと完全三つ折りの違いは、以下の記事で詳しく解説しています。
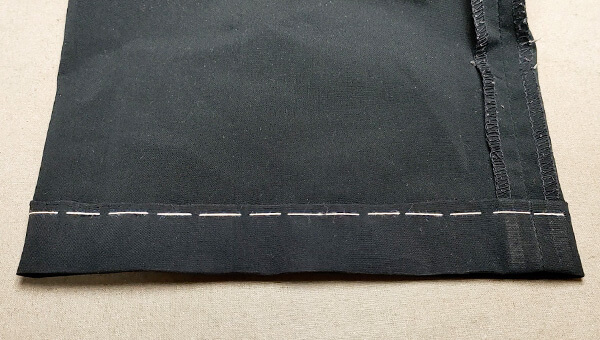
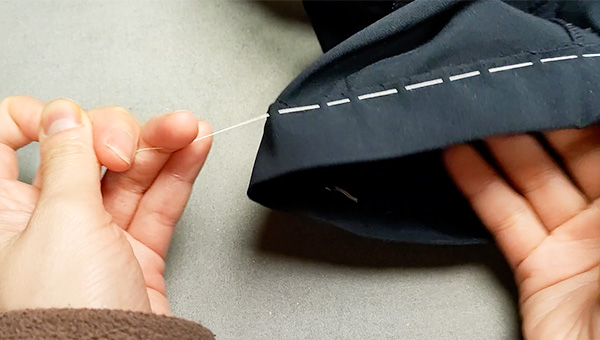
![](https://handmade-iroiro.com/wp-content/uploads/2024/11/threefold-difference-sewing-300x169.jpg)
![しつけをかける](https://handmade-iroiro.com/wp-content/uploads/2024/12/pants-hem-hand-stitched-method_02.jpg)
縫いズレを防ぐためにしつけをかけます。
もちろんまち針を打つだけでもいいですが、しつけをかけておくと生地が動かず縫いやすいです。
しつけのかけ方は、以下の記事で詳しく解説しています▼
![](https://handmade-iroiro.com/wp-content/uploads/2024/06/basting-thread-sewing-300x169.jpg)
![折山の裏側から糸を出す](https://handmade-iroiro.com/wp-content/uploads/2024/12/pants-hem-hand-stitched-method_03.jpg)
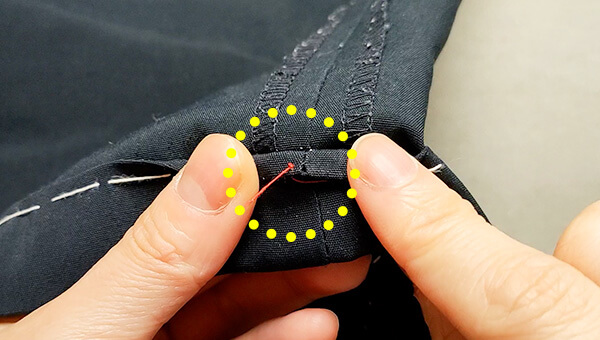
糸は1本どりで玉結びをし、折山の裏側から糸を出します。
![表布を1~2本すくう](https://handmade-iroiro.com/wp-content/uploads/2024/12/pants-hem-hand-stitched-method_04.jpg)
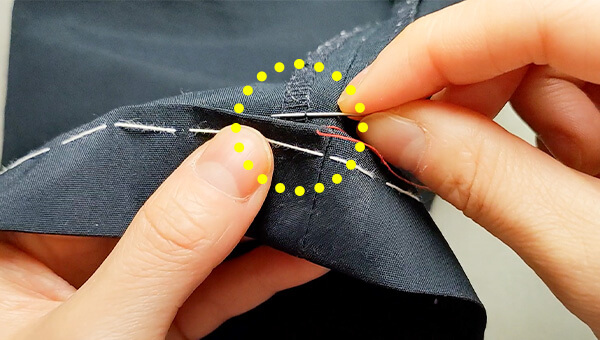
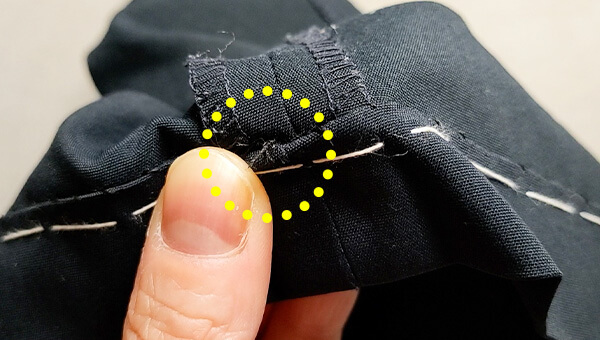
0.5㎝~0.7㎝先の表布を1~2本すくいます。
![折山を少しすくう](https://handmade-iroiro.com/wp-content/uploads/2024/12/pants-hem-hand-stitched-method_05.jpg)
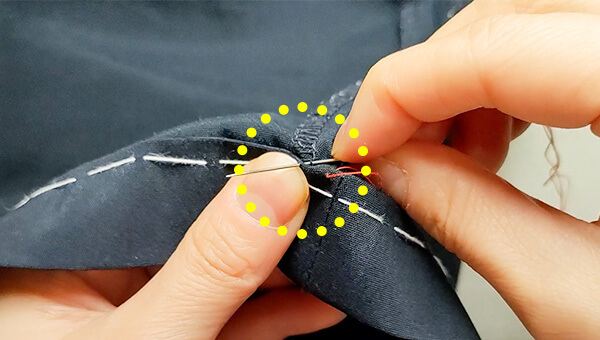
ATEP4のすぐ近くの折山を少しすくいます。
![STEP4→STEP5を繰り返して縫う](https://handmade-iroiro.com/wp-content/uploads/2024/12/pants-hem-hand-stitched-method_06.jpg)
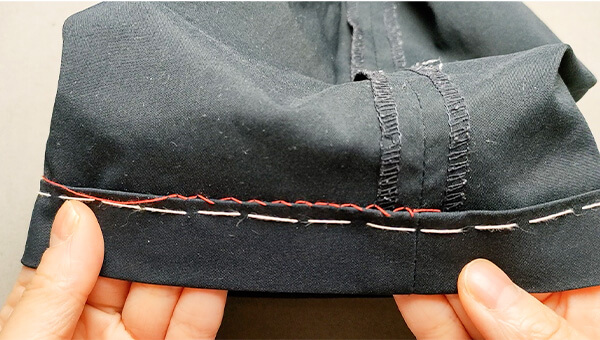
「表布を1~2本すくう→折山を少しすくう」を繰り返し、ぐるっと1周縫います。
糸を引き締めすぎるとひきつりの原因となります。糸は少し緩めにしておくと綺麗に仕上がります。
![玉止めをする](https://handmade-iroiro.com/wp-content/uploads/2024/12/pants-hem-hand-stitched-method_07.jpg)
折山の裏側に糸を出し、玉止めをし、糸をカットします。
![しつけをとる](https://handmade-iroiro.com/wp-content/uploads/2024/12/pants-hem-hand-stitched-method_08.jpg)
しつけ糸を抜きます。
表
![完成!①](https://handmade-iroiro.com/wp-content/uploads/2024/12/pants-hem-hand-stitched-method_09-1.jpg)
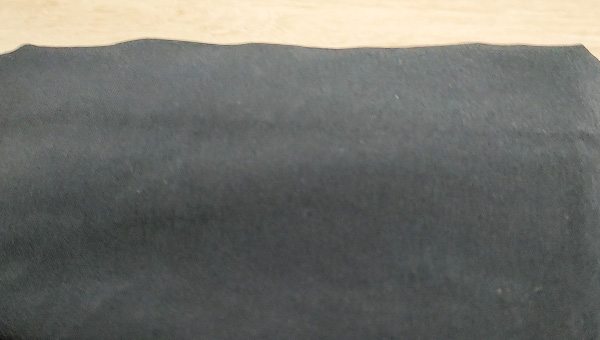
同系色の糸で縫えば、表には縫い目がほとんど見えません。
裏
![完成!②](https://handmade-iroiro.com/wp-content/uploads/2024/12/pants-hem-hand-stitched-method_09-2.jpg)
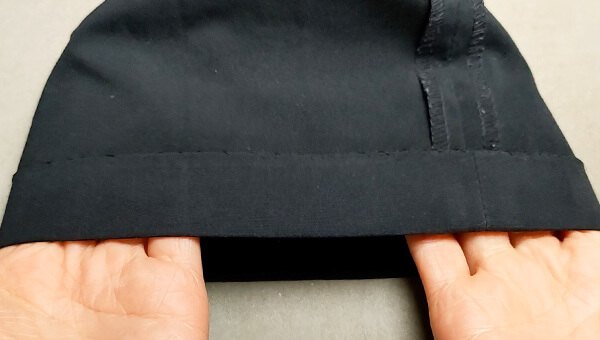
裏側もしっかりと縫われ、裾上げされています。
裾上げする際の出来上がり線や縫い代幅の決め方は、以下の記事で詳しく解説しています▼
![](https://handmade-iroiro.com/wp-content/uploads/2022/12/sewing-machine-pants-hem-2-300x169.jpg)
まとめ
今回は、“ミシン不要・手縫いのみ”で裾上げする方法を解説しました。
表に縫い目をできるだけ出したくないという場合は、流しまつりが便利です。
参考にしていただければ、幸いです。
その他、おすすめ記事は以下です▼
![](https://handmade-iroiro.com/wp-content/uploads/2024/06/thimble-need-300x169.jpg)
![](https://handmade-iroiro.com/wp-content/uploads/2023/11/sewing-useful-goods-300x169.jpg)
![](https://handmade-iroiro.com/wp-content/uploads/2023/05/dressmaking-iron-reccomend-300x169.jpg)
コメント